Where to Place Your Mini Split for Optimal Heating & Cooling
Mini split systems are a fantastic way to heat and cool your home efficiently. Unlike traditional HVAC systems, mini splits offer zone-specific temperature control, reduced energy consumption, and quiet operation. However, to maximize their benefits, proper mini split placement is crucial. Poor installation can lead to uneven heating and cooling, higher energy bills, and reduced system lifespan. This guide will help you determine the best locations for installing your mini split unit to ensure optimal performance and comfort.
Factors to Consider When Choosing a Mini Split Location
Selecting the right spot for your mini split involves more than just aesthetics. The following factors play a significant role in system efficiency and overall comfort:
-
Room Size & Layout: The unit should be placed where it can evenly distribute air throughout the space without obstruction.
-
Ceiling Height: Higher ceilings may require more strategic placement to avoid hot or cold air staying trapped above living areas.
-
Windows & Sunlight Exposure: Installing a mini split near windows with high sunlight exposure can cause the unit to work harder, reducing efficiency.
-
Obstructions & Airflow: Ensure the unit is not blocked by furniture, shelves, or curtains that could limit airflow.
-
Energy Efficiency: Proper mini split installation ensures that the unit does not consume excess electricity.
-
Indoor Air Quality: Avoid placing the unit in areas with high dust accumulation that can clog the air filter.
Best Locations for Mini Split Installation
To ensure your mini split operates efficiently, consider these ideal placements:
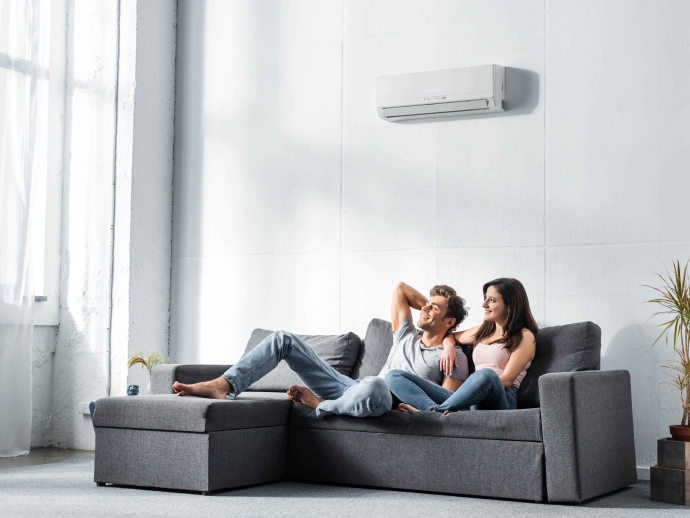
1. High on the Wall
Most mini split units are designed to be wall-mounted at a height of 6–7 feet above the floor. Placing the unit higher allows for better airflow, ensuring the room is heated or cooled evenly.
2. Near the Center of the Room
Positioning your mini split in the middle of a room helps distribute air more uniformly. This reduces temperature fluctuations and eliminates hot or cold spots. Building science suggests that an even distribution of air contributes to better climate control.
3. Above Doorways or Windows
If space is limited, installing a mini split above a doorway or window can be a great alternative. These areas are often less cluttered, allowing for unobstructed ventilation.
Worst Places to Install a Mini Split
While mini splits are highly versatile, certain locations should be avoided to maintain efficiency and longevity.
1. Near Heat Sources
Avoid placing your unit near stoves, ovens, or direct sunlight, as this can cause the thermostat to misread the room’s actual temperature, leading to unnecessary energy use. Heat sources can also impact the efficiency of the heat pump and compressor.
2. Behind Furniture or Curtains
Blocking the airflow of your mini split will significantly reduce its performance. Keep the area in front of the unit clear for optimal circulation. Proper placement ensures better refrigerant distribution and optimal operation of the air handler.
3. Too Low on the Wall
Placing the unit too low can disrupt the natural airflow pattern, making it harder for the system to regulate room temperature effectively. Proper bracket placement is essential for ensuring airflow efficiency.
Indoor vs. Outdoor Unit Placement Tips
A mini split system consists of both an indoor and an outdoor unit. Proper placement of both components is essential for overall efficiency.
Indoor Unit Placement Tips
-
Bedrooms: Install the unit on a wall facing the bed for even airflow without direct exposure.
-
Living Rooms: Center the unit on a main wall to distribute air evenly across the entire space.
-
Kitchens: Avoid installing near the stove to prevent the accumulation of oil and grease in the air filter.
-
Garages: Consider installing a mini split in a garage for better ventilation and temperature control.
Outdoor Unit Placement Tips
-
Keep the condenser unit in a shaded area to prevent overheating.
-
Ensure there is at least 2–3 feet of clearance around the unit for proper airflow.
-
Avoid placing it near trash bins, metal structures, or foliage to prevent debris from clogging the system.
-
Proper pipe and duct installation ensures refrigerant efficiency.
-
Avoid placing the unit on a concrete slab that can absorb heat and affect performance.
-
If installing on a roof, ensure that the unit is protected from wind and snow accumulation.
Professional vs. DIY Installation
While DIY installation might seem cost-effective, improper placement can lead to efficiency issues and system damage. Hiring a professional ensures:
-
Correct placement for maximum airflow.
-
Proper mounting using drywall anchors or brackets to avoid vibrations or noise issues.
-
Secure electrical and refrigerant connections to prevent leaks.
-
Correct installation of additional components like condensate pumps and valves.
If you do choose a DIY installation, be sure to follow the manufacturer’s guidelines carefully and seek expert advice if needed. Brands like Mitsubishi provide detailed manuals for proper mini split installation.
Conclusion
Choosing the right location for your mini split is essential for optimal heating and cooling. By considering room size, airflow, and potential obstructions, you can maximize your unit’s efficiency and lifespan. Whether you install it high on a wall, near the center of a room, or above a doorway, proper placement will ensure consistent comfort year-round. If in doubt, consulting a professional can help guarantee the best results. Invest in strategic installation, and your mini split will provide energy-efficient climate control for years to come.
For more information or questions regarding mini split installation, refrigerant types, or airflow concerns, feel free to contact a professional installer. If you need further guidance, you can also provide your email address to receive expert advice on maintaining your system and ensuring optimal indoor air quality.
